Setup procedure to upload & run a program in Arduino IDE:
1. Connect Your Arduino Board
Plug your Arduino board (e.g., Uno, Nano, Mega) into your computer using a USB cable.
- Open the Arduino IDE
Launch the Arduino IDE on your computer.
- Write or Open a Sketch
You can:
Write your code in the editor, or
Go to File > Examples to open a sample sketch (e.g., Blink).
Example of a simple sketch to blink an LED:
void setup()
{
pinMode(13, OUTPUT); // Set pin 13 as output
}
void loop()
{
digitalWrite(13, HIGH); // Turn on the LED
delay(1000); // Wait for 1 second
digitalWrite(13, LOW); // Turn off the LED
delay(1000); // Wait for 1 second
}
- Select the Board
Go to Tools > Board and select your Arduino model (e.g., Arduino Uno).
- Select the Port
Go to Tools > Port and choose the COM port where your Arduino is connected.
On Windows, it looks like COM3, COM4, etc.
On macOS/Linux, it looks like /dev/cu.usbmodem…
- Verify the Code
Click the checkmark icon ( ) at the top left to verify/compile your code.
- Upload the Code
Click the right-arrow icon ( ) next to the checkmark to upload the code to the Arduino.
- Check Output (Optional)
Use the Serial Monitor ( icon or Tools > Serial Monitor) if your sketch includes serial communication (e.g., Serial.print()).
Also Check:

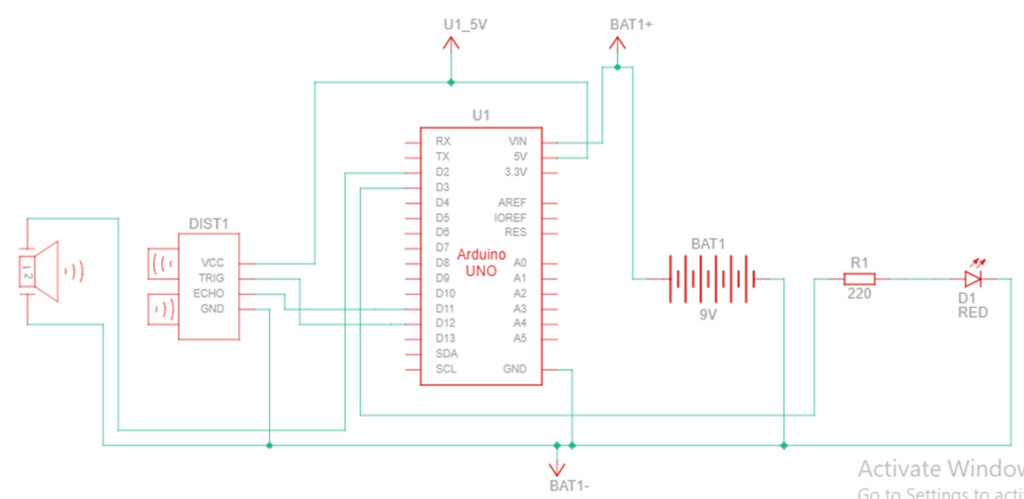
Best Use Of Arduino With Ultrasonic Sensor
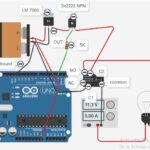
Best Use Of Arduino With Relay